Showing posts with label Spray paint. Show all posts

Monday, September 24, 2012

DIY: Spray Painted Pumpkins

It's finally fall which means the decor around my house is changing a little. I like to decorate around seasons and holidays a little bit, but I don't go to the point where I'm swapping out wall art or anything like that.

 Please excuse my horrendous drawing skills.

While at Dollar Tree last weekend (great place to find cheap craft items to makeover, by the way) picking up some party supplies, I spotted some fake pumpkins and knew I could make them look much better than they did then.

I've seen lots of different pumpkin reformations on Pinterest and I've always liked the metallic ones. They just look cool and classy and don't scream "HALLOWEEN" like a bright orange pumpkin does. I also wanted to try chalkboard paint on some, so I did that, too.

I had all of the spray paint on hand from previous projects and thankfully the faux pumpkins took the spray paint like champs.

The supplies:
 Pumpkins bought at Dollar Tree

 Leftover spray paint from various projects

Final products:


 Seriously love this hurricane vase I got at Goodwill a while back. It's an awesome year-round centerpiece!

For $1 each, I like them! Plus, they are versatile and can be used in a variety of ways in the future. I thought I would like the metallic ones the best, but I think the chalkboard pumpkins turned out really cute.

Also, how adorable are these stuffed pumpkins my mom made?

She's been making these for a few years now and selling them at local craft shows. When she got married last year, she made about 100 of them and let people take them home, so that's where I snagged these.

I have a few more Halloween things to put out, but I think it's too early for that stuff, so the pumpkins will be it for now.


Friday, August 10, 2012

DIY: Painted and Stenciled Night Stand

I bought this night stand at a yard sale earlier this summer, thinking it would go nicely next to the Mr.'s side of the bed. We currently just have a little Ikea table there because it was cheap and it fit, but I wanted something with more height and a drawer so all of his junk wouldn't just be laying out in plain sight. This was $5 and it fit the bill, and even though it's not the sturdiest thing ever, I grabbed it.


It needed a new paint job desperately, but I didn't really know what I wanted to do with it, so it sat in the garage for a few months while I thought about it (meaning I had other projects I wanted to do first).

After looking through Pinterest at other dressers and night stands, I decided I wanted to do a metallic paint on it. I thought it would look nice next to our new headboard and our bedspread has silver in it, so I gave it a try.

My supplies:


I lightly sanded it to remove the yellow paint on top and smooth it out a little bit. Although I normally don't prime things before spray painting them, I did this time since it's a furniture piece and I wanted it to look nice. After the primer, I sprayed on several coats of Rustoleum's Metallic Spray Paint in the color Chrome. As you can see, it's a pretty shiny finish.


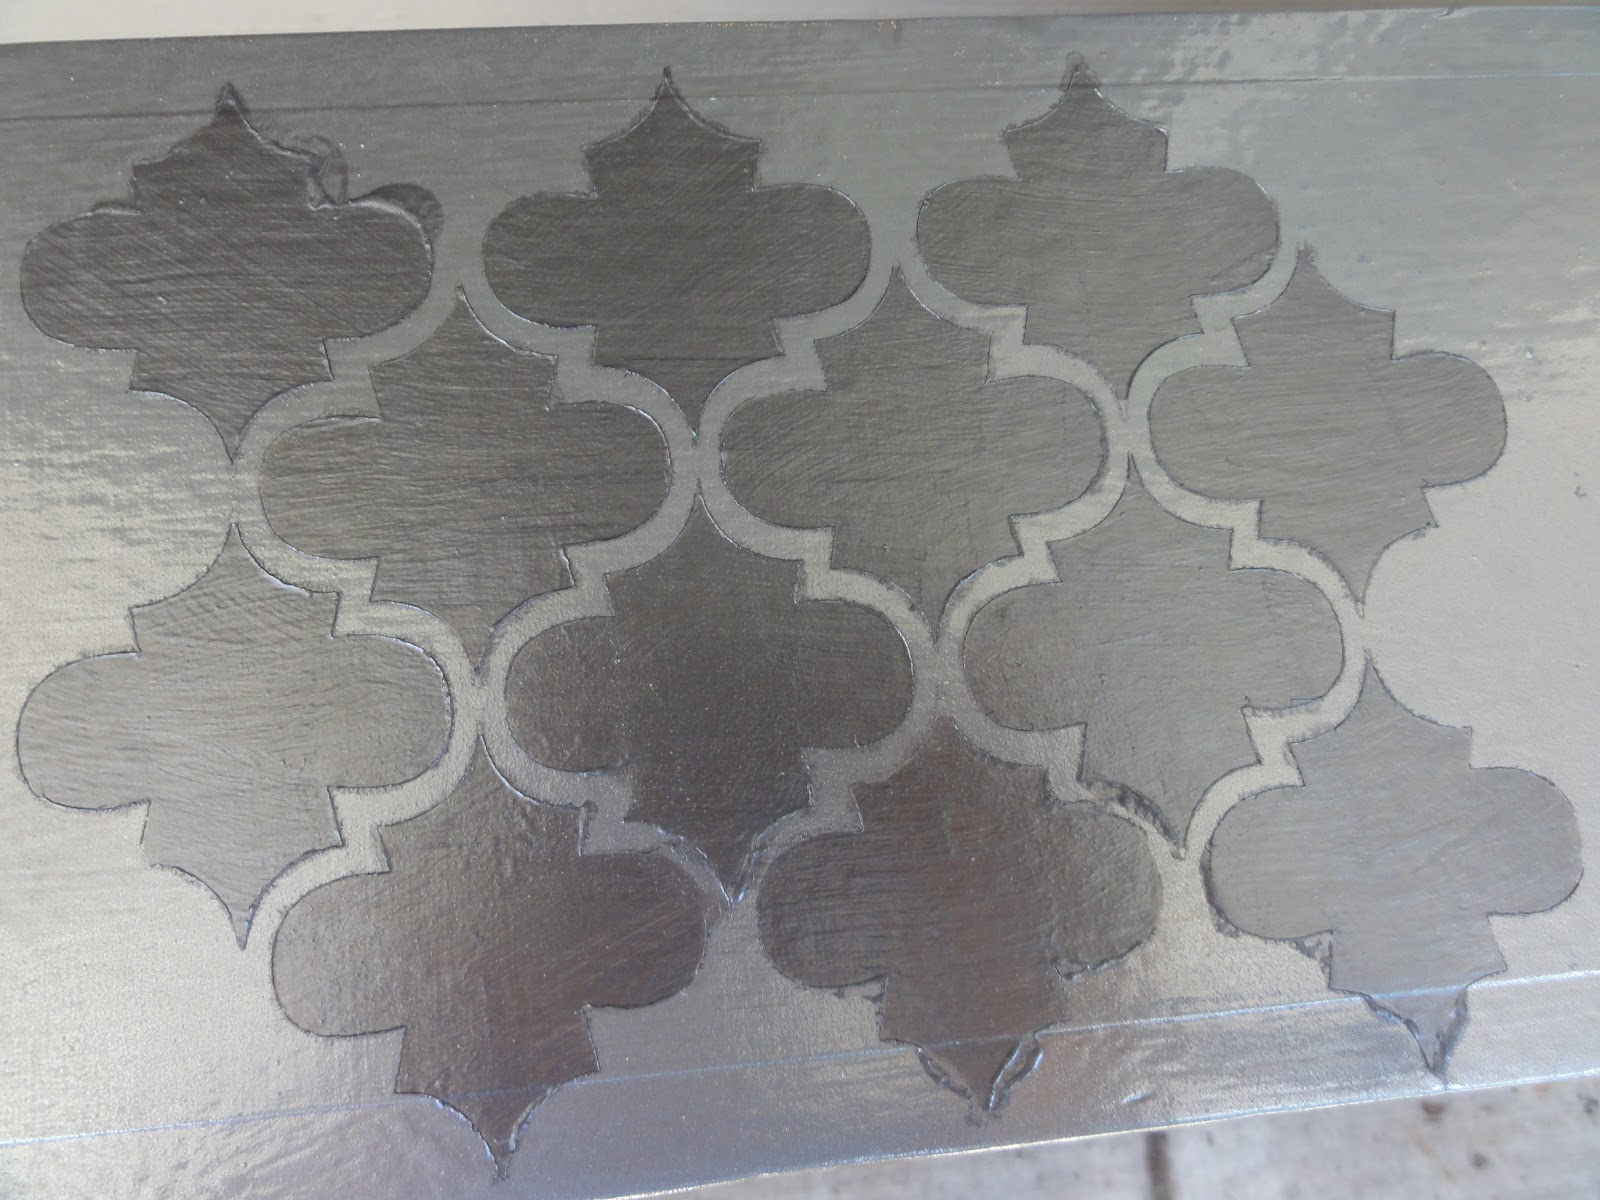
After I had two full cans of the chrome spray paint on the whole thing, I stenciled the drawer with a darker pewter paint to add some contrast. My sister-in-law loaned me some Martha Stewart stencils so I didn't have to buy them.


You can see there is some seepage where there shouldn't be, but I just cleaned up the areas with a wet q-tip right after I removed the stencil and most of the excess paint came off. 

Finished drawer.

The stenciling was kind of a pain in the ass. Lining up the stencil in the exact position was tough and making sure all of the little crevices were stuck down took some patience. But I really like how it turned out! 

Since our bedroom is dark, here is the finished product in a better lit room. 


And in our room:


(Sorry for the darkness)

The stenciled shape matches the shape on our pillow covers almost exactly, so I was pumped about that, too. 


Tips for using metallic spray paint:

  • This stuff is very unforgiving. Metallic spray paint shows off fingerprints like no other. I touched the drawer with my thumb and the fingerprint is just hanging out there, never to be wiped off. Thankfully, it got stenciled over. Maybe wear gloves when handling the items? The night stand also has a few imperfections in the form of dents/scratches and the silver spray paint accentuates them. I'll pretend that it adds "character." 
  • It does not cover nicely. I used at least four or five coats to get a good cover on this thing, which meant two full cans of spray paint. 
  • You have to do thin coats. If you spray excess in any one area, it shows through on the next coat and can make it look splotchy. I tried to make mine as even and thin as possible, but there are still spots that look a little darker because that area went on too thick. 
Tips for using stencils:
  • Make sure all of the crevices of the stencil are really stuck down to the item by using a spray adhesive. Most are temporary if you only spray one side (so just spray the back of the stencil). I had paint seep under the stencil in a few places so I had to go back with a q-tip and clean it up.
  • Don't wait for the paint to dry to remove the stencil. You want the paint to still be wet so you can go back and touch up if needed. 
  • Wash the stencil between sections so any paint that did seep through the back is wiped off and doesn't get on the next section of whatever you are stenciling. 
Cost breakdown:
Night Stand: $5 at yard sale
1 can Rustoleum Primer: $3.44
2 cans Rustoleum Metallic Spray Paint in Chrome: $3.71 x 2 = $7.42
1 min jar of Rustoleum Metallic Accents Paint in Real Pewter: $3.98
Stencil Brushes, which I didn't use: $2.97
Stencils: Free, borrowed from sister-in-law

Total: $22.81 

Thursday, July 19, 2012

DIY: Updated Lamp Shades

I saw this lacy lamp shade post on Pinterest and really liked the look of the lace. I happened to have two blank lamp shades that were begging for a makeover.

I decided to do the lace treatment to one of the shades that was in our bedroom and chose to wrap the second shade in yarn and put it in our basement.

Basically, I followed the exact steps listed in the link above, so I'm not going to rehash the whole process, but will offer a few tips at the end of the post that I wish I would have known.

First, the lacy lamp shade.


My lamp shade was a dark gray color, so I stuck the lace on top of that and spray painted white. My friend also made one, but her lamp was white and she spray painted navy over the lace.


I really like how it looks and the lamp goes nicely with the colors in our room. Once I get the bedroom completely decorated how I want it, the lamp will tie in nicely. 

Now for the tips:
1. Make sure you stick the lace down really well with a repositionable spray adhesive. There are some spots on our lamp shades that got a little blotchy because the lace wasn't completely stuck down. Fortunately, we were able to just turn those parts toward the wall.

2. Use light, even coats of spray paint. I think I went a little too heavy handed in some spots. 

3. My friend's lamp shade was a weird shape and it was tough to get the lace cut out to fit the shade. We ended up cutting two sections that looked like a 3rd grader cut them, but it worked in the end. But, I would definitely say this method is easiest on a perfectly round or square lamp shade. 

I wrapped my second lamp shade in yarn. I had this pinned, so I figured I'd whip up my own version. I already had some gray yarn and then I picked up a really nice goldenrod yellow color. I really didn't have a reason for that color combo other than I like gray and yellow together. 


There is a nice ugly strip of yarn in the back where I stopped and started the different colors of yarn, but I'm not sure how that could be avoided. Again, I just faced that side to the wall and it looks just dandy.